PvME is open-source! If you have a suggested improvement, use Suggestions (external Discord)
This guide lists the recommended Action Bars to use in Revolution combat mode (see section Configuring Revolution+ later in this guide for more info).
The different combinations of bars are:
⬥ Single-target  (e.g., most bosses)
⬥ Multi-target  (e.g., slayer mobs)
⬥ 2-handed (only one weapon can be equipped)
⬥ Dual-wield (where two weapons can be equipped, one in each hand)
If a combination is not displayed, it means the bar scored poorly in tests and is not worth using.
Disclaimer
No revolution bar is perfect for every situation - unless you have accessibility needs, we strongly recommend learning full manual to gain total control over which abilities are fired when. You can find more information in Revo To Full Manual
Variances may include:
⬥ Single-target bars performing differently based on duration of the fight
• Testing was conducted at both War's Retreat dummies and Vindicta
⬥ Multi-target bars performing differently based on the number of enemies surrounding you, and their life points
• Multi-target testing was conducted at Abyssal Beasts in the Sunken Pyramid
Melee Bars 
Basics only
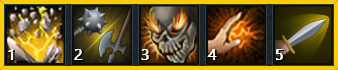
Single-target / 2-handed

Single-target / Dual-wield

Multi-target / 2-handed
⬥ In testing  increased kph by +10% over


Ranged Bars 
Basics only
⬥ Use  in place of
 if unowned
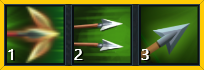
Single-target / 2-handed and Dual-wield ( )

Multi-target / 2-handed ()
⬥ It is not worth using Mechanised Chinchompas  if you have access to a T85+ bow
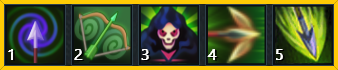
Magic Bars 
Basics only
⬥ Use  in place of
 if unowned
⬥ Include  if using
 and
 as primary weapons
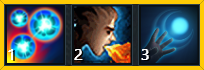
Single-target / 2-handed and Dual-wield
⬥ Auto-cast 

Multi-target / Dual-wield
⬥ Auto-cast 

Multi-target / 2-handed
⬥ Auto-cast
⬥ In testing (the above bar) increased kph by +10% over  (this bar)

Necromancy Bars 
⬥ Customise  to use all available conjures
• Prioritise Ghost > Skeleton > Zombie > Phantom
Basics only
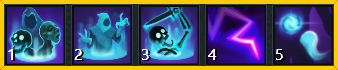
Single-target

Multi-target

Configuring Revolution++
Source record
By PvME contributors under CC BY-NC-SA 4.0. Navigation and typography adapted. Original sanitized source HTML and its text hash are retained separately. Source channel and message references are repaired using the pinned guide repository and public directory/identity evidence; navigation wording is adapted for the web. Every change is recorded in the reference repair ledger. Unverified destinations and contributor names remain explicitly unavailable. Legitimate external community and attribution links are preserved and labeled. Original media is embedded from providers; media rights are separate from guide-text rights.
Captured 2026-11-10T14:24:29Z. Game-version accuracy is unverified.
MediaWiki draft ↓