Introduction
The Sanctum of Rebirth is a boss dungeon set in the Underworld. Formerly owned by Amascut, three soul devourer bosses can be fought after completion of the Soul Searching quest.
⬥ This is an advanced guide and assumes a deep understanding of the boss's rotations and mechanics for the Hard Mode version of the Sanctum of Rebirth, found in Sanctum HM Mechanics Overview.
⬥ Only in Hard Mode is the Shard of Genesis Essence dropped, which upgrades Tier 95 weapons to Tier 100.
Note: the rotations in this guide are still being optimised, so you may need to improvise.
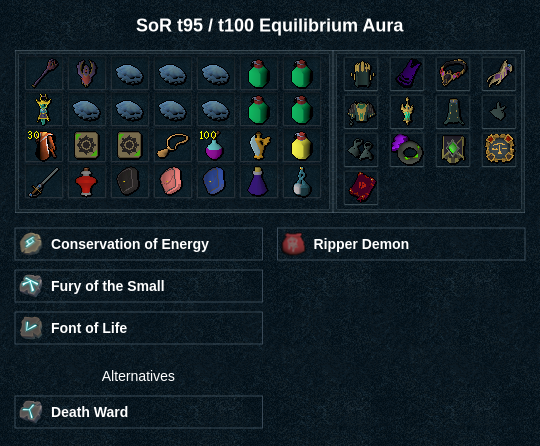
Presets and Relics
⬥ Necromancy t95 / t100 preset 
⬥  /
 /
 are not needed for the t95 rotations.
Vermyx, Brood Mother
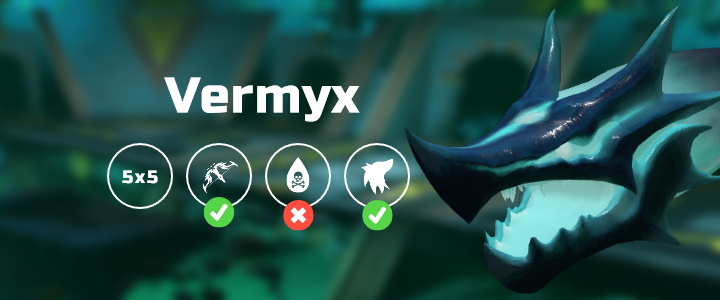
Vermyx's Attack Rotation
⬥ Vermyx uses both Melee  and Ranged
 auto-attacks, while Coilspawns only attack with Ranged
• Auto-attacks cause 2% armour break per successful hit.
⬥ Every auto-attack Vermyx's adrenaline bar fills by 50%, starting a new mechanic when full.
Phase 1
3 autos → Moonstone Shards → 2 autos → Wyrmfire + 2 autos → repeat
Phase 2
3 autos → Moonstone shards → 2 autos → Soul Bomb → 1 auto + bomb hit (in that order) → 1 auto → Wyrmfire → 8 autos + Scarab Healer → Moonstone Shards
Phase 3
3 autos → Scarab Healer (+ autos continue) → 3 autos → Moonstone shards → 2 autos → Soul Bomb → 1 auto + bomb hit (in that order) → 1 auto → Wyrmfire → 7 autos + Scarab Healer → Wyrmfire
T95/100 Rotation
⬥ This rotation seeks to consistently hit around ~1:30 kill times.
⬥ Sometimes you may not be able to build off of Coilspawns due to the limited range of Necromancy
⬥ You can flank  by standing right next to Vermyx's head.
⬥ Stay in the center after  to not get attacked by Coilspawns from multiple sides, may stand on the green lines during phases 2 and 3 for a similar result.
Pre-build
 →
 →
 →
 →
 →

Note: with T100, use before
Phase 1
+  →
 →
 →
 →

 → →

 →
 → go to Coilspawn
→  → → → →
 +
 → → → → → go to Vermyx
Note: after position yourself so that both western Coilspawns have a chance to hit you.
Phase 2
→ →  → →
 → → → → go to Coilspawn
→ → → → → → → → go to Vermyx
Note: abilities after depend on  and Vermyx's LP, depending on damage and you can skip / /
Phase 3
→ → → → → → → → →  → → → improv
Kezalam, the Wanderer
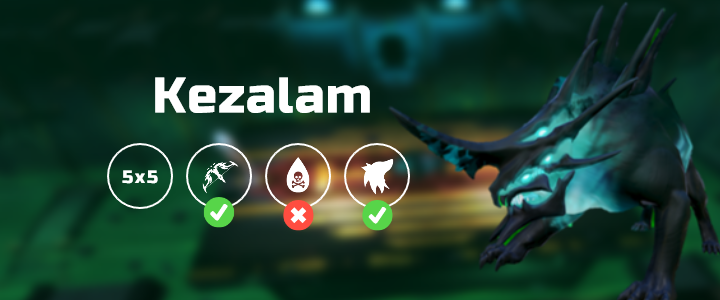
Kezalam's Attack Rotation
⬥ Kezalam uses both Magic  and Melee auto-attacks.
⬥ Can be stunned (delays rotation).
⬥ Every auto-attack gives it 25% adrenaline, at 100% it uses its next mechanic. Adrenaline carries over between phases.
• Kezalam starts at 100% adrenaline.
⬥ For phase 2 and 3, the first mechanic is determined by the last mechanic of the previous phase.
Phase 1
SB-Scattered → Moonstone Prison + Soul Bomb → SB-Targeted → SB-Scattered → Unstable Scarabs → SB-Targeted → repeat
Phase 2
Kill Moonstone Obelisk → SB-Line → SB-Targeted → Unstable Scarabs → SB-Line → SB-Targeted → Moonstone Prison + Soul Bomb → repeat
Phase 3
Kill Moonstone Obelisk → Moonstone Prison + Soul Bomb → SB-Line → SB-Scattered → Moonstone Prison + Soul Bomb → SB-Line → SB-Targeted → repeat
T95 Rotation
⬥ This rotation seeks to consistently hit around ~2:24 kill times.
⬥ May instead deal with prison this way:
• Be MD+1 when prisoned → break free → + (remaining souls) →  + (back in prison) → →
⬩ An example of this is shown here.
⬥ Do not  scarabs if you want it to be off CD for Nakatra.
Pre-build
→ → → →
Phase 1
Kezalam
+ → → → → → → → → → → →
 /
 → → → (evade bomb) → → → → → → →
Moonstone Obelisk 1
→ → → → →
Phase 2
Kezalam
→ → → → → → → → → → →
→ + → → → → → → → → →
Moonstone Obelisk 2
→ → → → → → →
Phase 3
→ → → → → → → →
→ → → → → → → improv
T100 Rotation
⬥ This rotation seeks to consistently hit around ~2:10 kill times.
⬥ May instead deal with prison this way:
• Be MD+1 when prisoned → break free → + (remaining souls) → + (back in prison) → →
⬩ An example of this is shown here.
⬥ Do not scarabs if you want it to be off CD for Nakatra.
Pre-build
→ → → →
Phase 1
Kezalam
+ → → → → → → → → → → → →
/ → → + (evade bomb) → → + (into prison) → → → →
Notes:
⬥ Depending on LP may add more abilities before such as
⬥ Allow to phase Kezalam, and use while running to the Obelisk.
Moonstone Obelisk 1
→ → → → improv
Note: use as soon as pillar is dead.
Phase 2
Kezalam
→ → → → → → → → → →
+ → → → → → → → → →
Moonstone Obelisk 2
→ → → → → → improvise
Notes:
*⬥ Allow and conjures to phase Kezalam, and position yourself as shown here.
• Move out of bounce range of Kezalam once she's phased.
• Only possible if all moonstones are dead (e.g., damage during )*
Phase 3
→ → → → → → → →
→ → → → → → improv
Nakatra, Devourer Eternal
Nakatra Rotation
⬥ Nakatra switches between Magic and Ranged auto-attacks after each set.
• Each auto-attack gives 33% adrenaline.
⬥ Nakatra uses a mechanic every time her adrenaline bar is full.
• In phase 3, mechanics are mostly time-based.
Note: Hard Mode starts at 200 corruptive stacks, which increase her auto-attack damage.
Phase 1
Nakatra says I am afraid this is where your story ends.
2 autos → Soulfire Wave → 3 autos → Obliterate → 3 autos → Soulfire Wave → 3 autos → Soulfire Wave + Summon Scarabs → 1 auto → Soulfire Wave → 3 autos → repeat
Phase 2
Nakatra says The sanctum is mine to control.
2 Tiles → 3 autos → Obliterate → Soulfire Wave → 3 autos → 2 Sanctum Hieroglyphs → 3 autos → Soulfire Wave + Summon Scarabs → 3 autos → 2 Sanctum Hieroglyphs → repeat
Phase 3
Nakatra says The Sanctum will protect me while I only grow stronger.
Summon Nefthys + Soulfire Crosswave → Soulfire Wave → Soulfire Crosswave → Soulfire Wave → Heal Nefthys → repeat
Phase 4
After the last Nefthys dies, Nakatra shouts Suffer the full power of the Sanctum!
Shadowsands → 3 autos + Sanctum Shockwave → Obliterate → 3 Sanctum Hieroglyphs → Soulfire Wave → 3 Sanctum Hieroglyphs → repeat
T95 Rotation
⬥ This rotation seeks to consistently hit under ~3:00 kill times.
⬥ In order to survive Obliterate without  you must be 12k LP before and have
 /

• This may be achieved via  or

• For Obliterate only for hit 3.
• Make sure  is active.
Pre-build
 (while banking) → → → → → →
 → +

Phase 1
+ → → → → → →
→ → → →  → → → improv
Phase 2
+ → → → → → → → → → →
+  → → → → → → → → → →
→ → → → → improv
Note: if scarabs spawn you may  or →
Phase 3
Nefthys 1
→ → → → → → → → → →
Nefthys 2
→ → → → → → →
Phase 4
Nakatra
→ → → improv
Notes:
⬥ Use abilities as phase 4 begins, can use phase counter as a visual.
*⬥ May fit in 4 abilities if using 1 tick before phase 4 begins.
• Use wave positions as a visual cue, shown here.*
Shadowsands
→ → → (tc) feline akh + → → → → improv
Notes:
⬥ Try to group felines and gorillas so that → gives 3 
⬥ Build to full off gorilla if needed.
Nakatra
→ → → → → + → → → → → →
→ → →  + + + → → → → → improv
Note: use when it becomes available.
T100 Rotation
⬥ This rotation seeks to consistently hit under ~2:45 kill times.
⬥ In order to survive Obliterate without you must be 12k LP before and have /
• This may be achieved via or
• Make sure is active.
Pre-build
+ → → → → → →
Phase 1
+ → → → → → → →
→ → + → →  + → → improv
Phase 2
+ → → → → → → → → →
→ → → → → → → → + →
→ → → → → →
Notes:
⬥ For Obliterate pray for hits 2 and 3.
*⬥ → (equip) + + (equip) → (equip) 
• Use command !0tick for more info.*
⬥ After stand in both Soulfire Waves for extra damage, ~4k damage taken with
Phase 3
Nefthys 1
→ → → →  + (to Nefthys 2)
Nefthys 2
→ → → → →
Notes:
⬥ is done later due to the timing for
⬥ Stand MD and tank Wave with
Phase 4
Nakatra
→ → → →
Shadowsands
→ → → (tc) feline akh 1 → → → (tc) feline akh 2 → →
Note: build to full off gorilla if needed.
Nakatra
→ → → → → → → → → → → →
→ → → + + → → → → → → improv
Note: for Obliterate pray for hit 3.
Example Kills
⬥ Vermyx
Content Provided by: @vex92
Formatting Maintained by: Cris
Source record
By PvME contributors under CC BY-NC-SA 4.0. Navigation and typography adapted. Original sanitized source HTML and its text hash are retained separately. Source channel and message references are repaired using the pinned guide repository and public directory/identity evidence; navigation wording is adapted for the web. Every change is recorded in the reference repair ledger. Unverified destinations and contributor names remain explicitly unavailable. Legitimate external community and attribution links are preserved and labeled. Original media is embedded from providers; media rights are separate from guide-text rights.
Captured 2026-11-10T14:26:19Z. Game-version accuracy is unverified.
MediaWiki draft ↓